|
Stetsbar Tremolo For
Stratocaster: Installation Report A Critical Look At The Bigger Picture last update: June 9, 2022 Copyright 2020-25 by
H. Gragger. All Rights Reserved. All information
provided herein is destined for educational and
D.I.Y. purposes only. Commercial re-sale,
distribution or usage of artwork without explicit
written permission of the author is strictly
prohibited. The original units with their
associated trade-names are subject to the
copyright of the individual copyright owner. The
Author is by no means affiliated with any of those
companies. References to trade names are made for
educational purposes only. By reading the
information provided here you agree to the Terms
of
Use. The working language
is kept in English as an aid. Read here
why.
|
|||||||||||||||||||||||||||||||||||
| MAIN PAGE>MUSIC STUFF>STETSBAR Index Preface
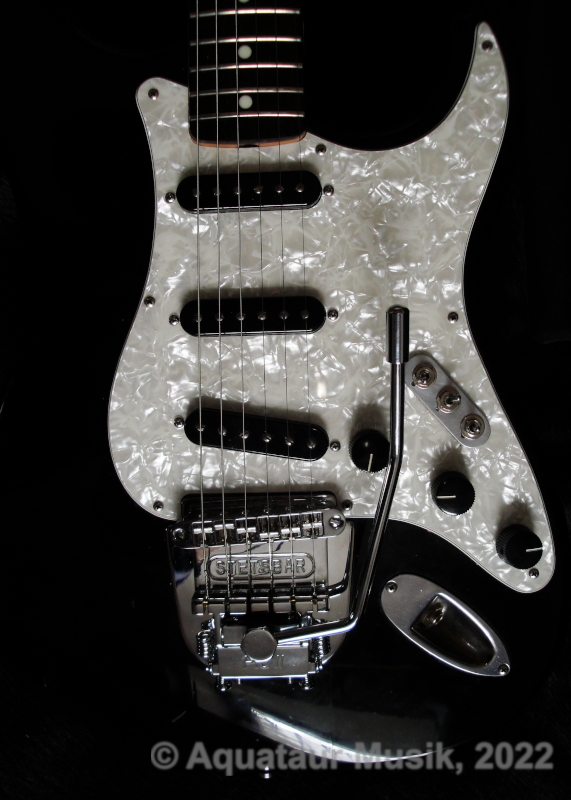
We will see that many things in sales videos are suggestive. Our mind tends to fill out the gaps and interprets things, that have never been said. Greetings from Hollywood! Indeed, if I had been able to see the bigger picture beforehand, I may have been not running to the shop so overcredulous, because this system, like any other of the sort, has its own pitfalls and quirks. After all, having taken care of the other half of the equation, I may have been able to get the existing tremolo system to work acceptably, which may have rendered the purchase redundant to a degree. However, with a little luck I did get it working well, albeit nowhere near in the postulated short time (read: work load), and I did indeed fall for the trap: no floating tremolo without penalty. I left it blocked for the moment (just slacking action). That all said, it ends up a very nice tool that has its merits. May you profit by the story that enfolded... As far as my skills as photographer are concerned, excuse the fuzz. Pictures made with flash are unforgiving. The camera sees things you swore were not there. And finally, I do not have to sell anything... Hardware Installation My Stratocaster has a tremolo cavity opening that is too small to accommodate the Stetsbar's back side. The milled oval piece of metal protruding from its underside may have been made slimmer by two millimeters without adverse effects. I had to remove some of the wood with a rasp. Luckily, the wood was only some millimeters thick towards the side away from the neck. Different to the neck oriented side, which is in place material.
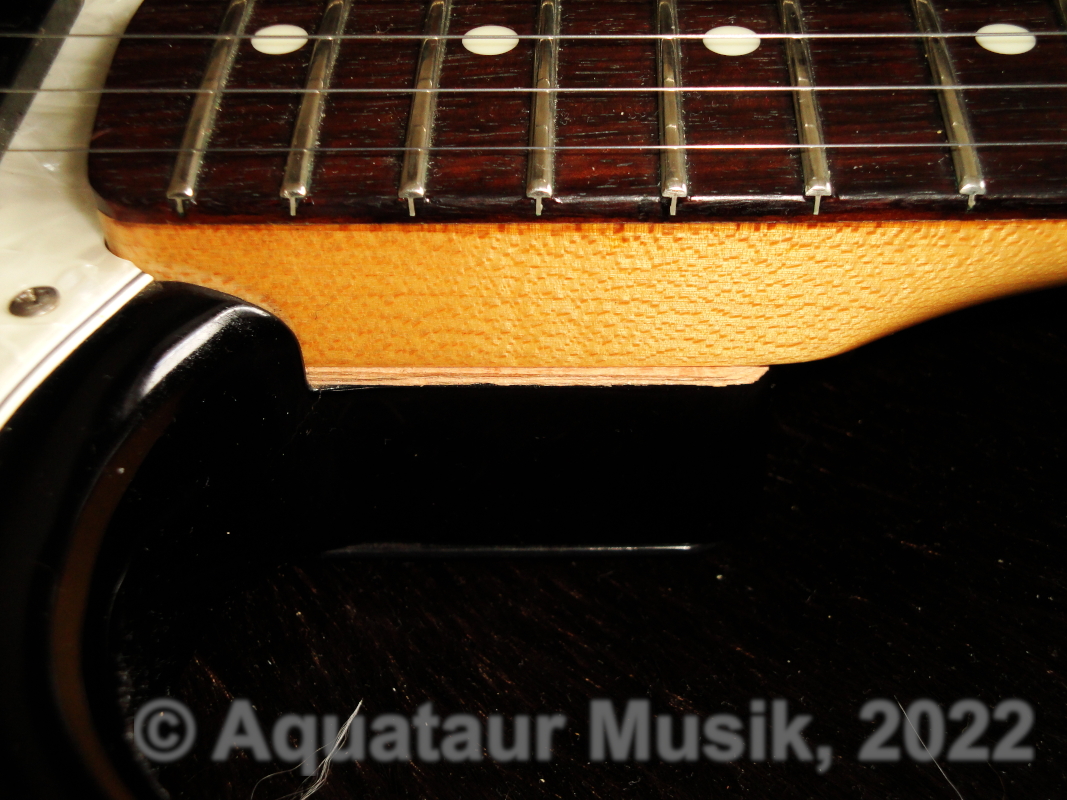
Neck Adjustment To compensate for the raised action the neck angle needs to be adjusted accordingly. It requires a slight lift overall plus some slant. It was hard to predict how much, so this was trial and error. Following the traditional method one would put anything under the neck that would raise its butt end, but this method has recently been deprecated since it invites all sorts of problems, starting from neck humping to loss of sustain to intrusion of moisture. Nowadays full-sized wooden wedges are favored. Indeed I used to have sustain problems around the 12th fret. Lo and behold, the neck shim consisted of no more than a piece of questionable material of the right thickness positioned towards the front of the pocket. The resulting cavity was obviously causing the problem. You would not have suspected, since this was the method of choice.The raw shim that comes with the package could work this way, except it is too small overall for my neck pocket, which again invites trouble (moisture, uneven mount, sustain). Also, their method of shimming (using a fractional neck support) is strongly advised against these days. It felt like bungle and malpractice[1] using it in the lights of that.
A TOM (Tune-O-Matic) bridge is made for Les Pauls and the like. Moving this onto a Stratocaster potentially invites trouble:
Those points
have not been addressed in their advertisements
/ videos which I consider unfair, because they
require a lot of attention. This quickly
pulverizes the picture of a quick and effortless
swap which is being conveyed.
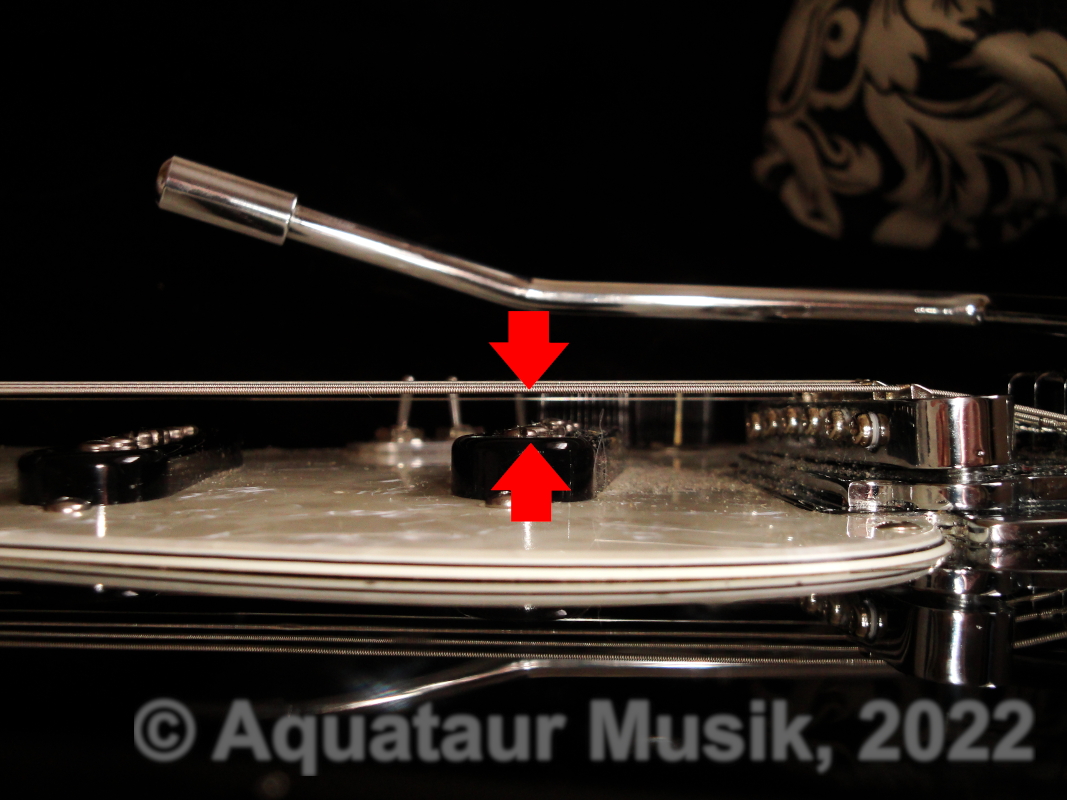
The receptacle for the ball end might have been positioned somewhat further upwards without detriment. The string's downward angle would have been less steep, pressure on the bridge much lower and the strings would not touch the rim. Maybe leeway for improvement? Are you reading this Eric?
Avoiding string buzz - this leads us straight to the next point:
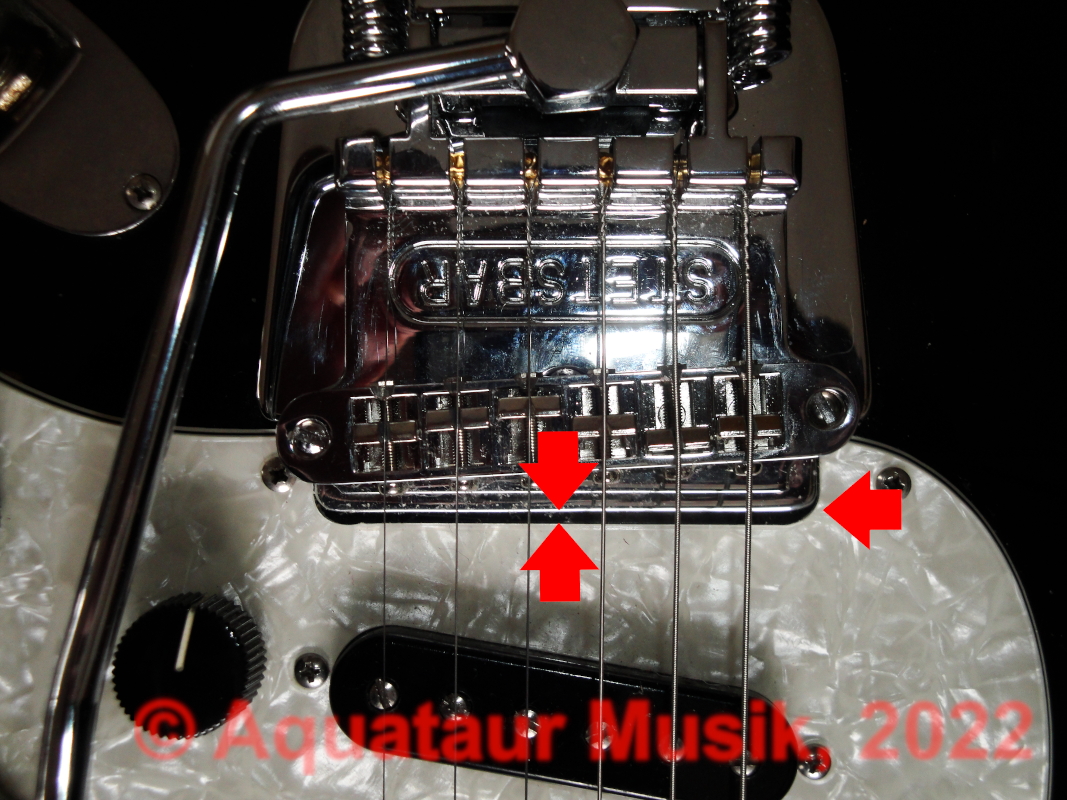
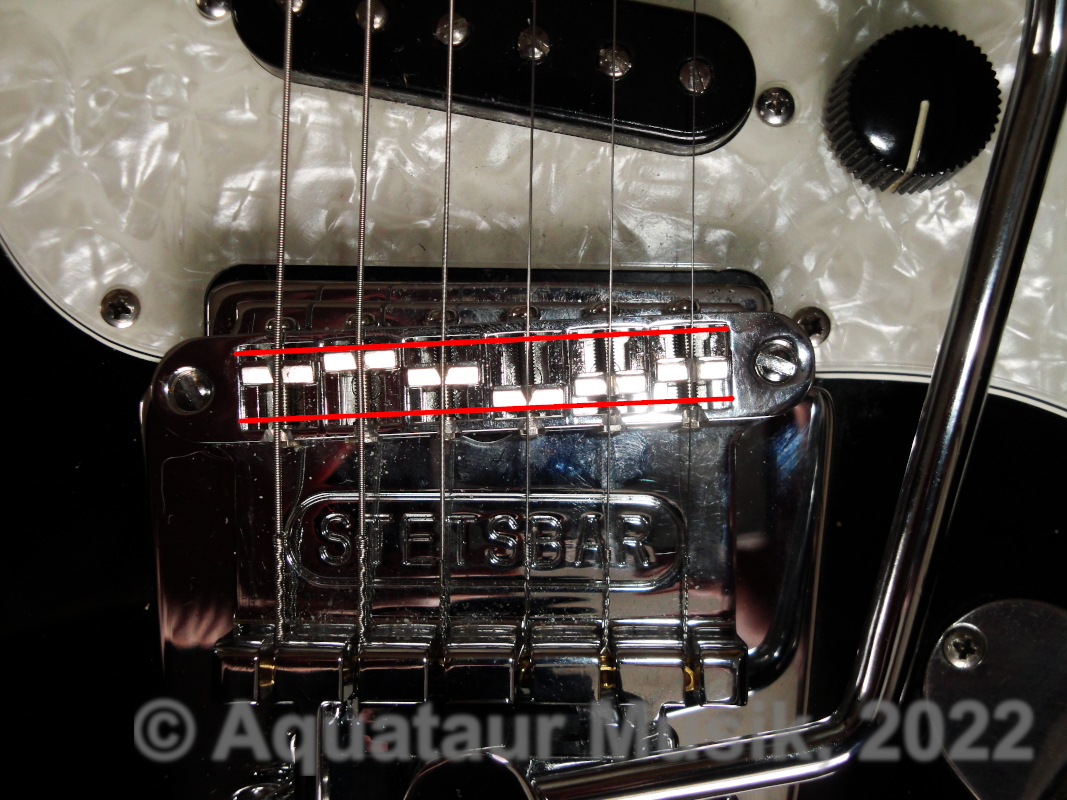
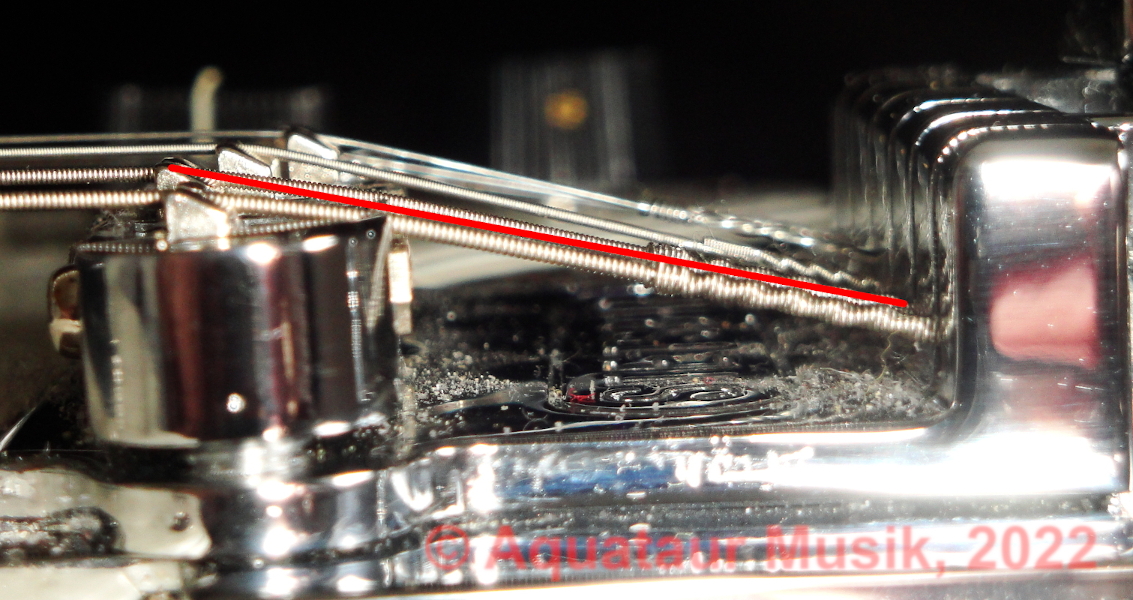
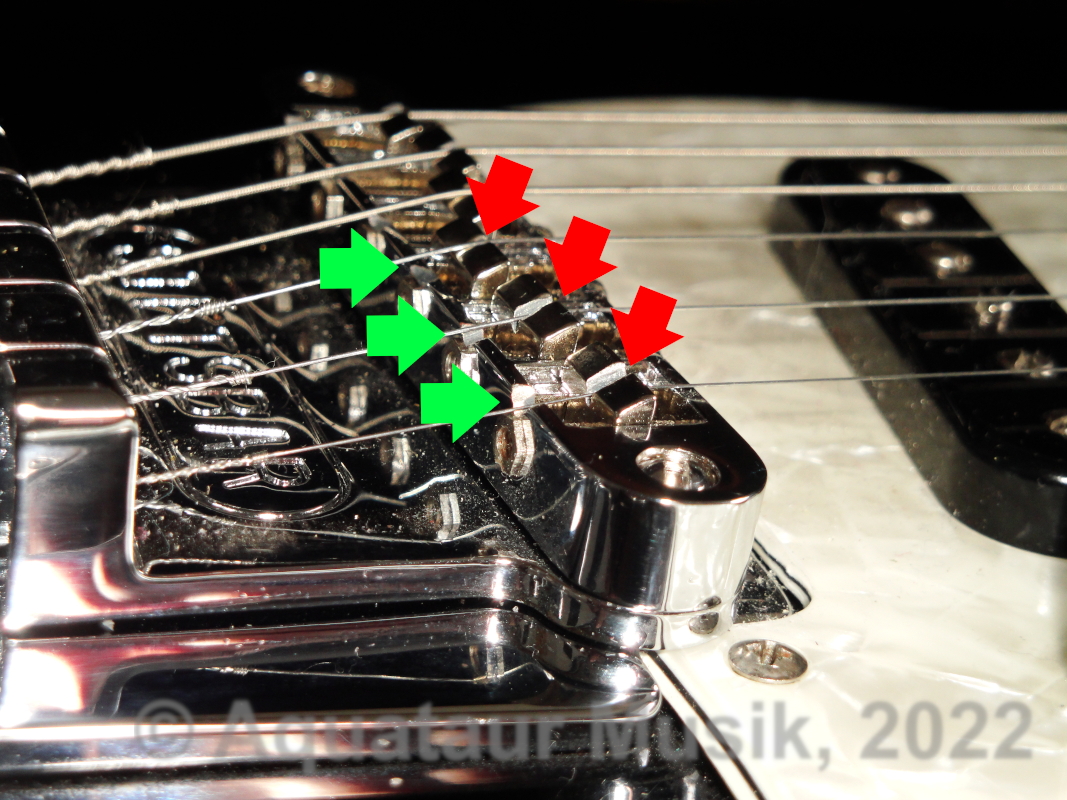
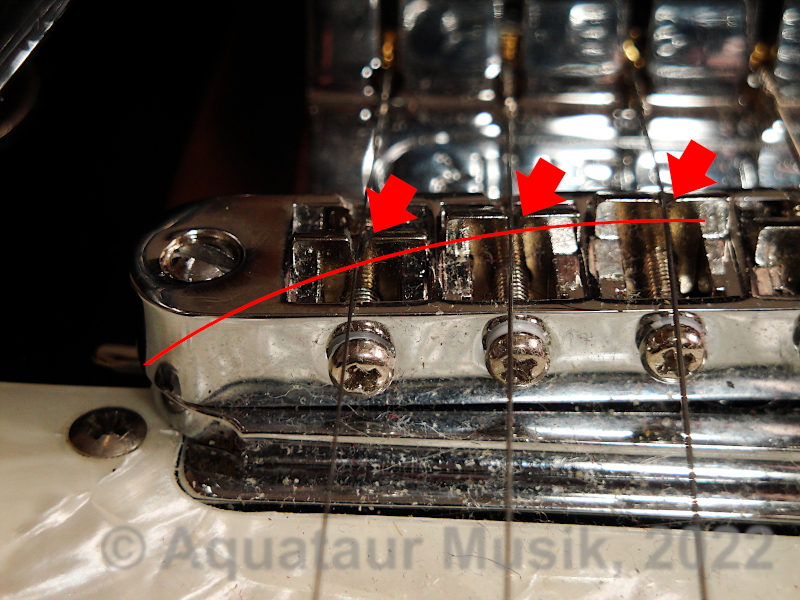
Again, I used the Dremel to file down the saddle grooves until the string underside curvature measured at the bridge with the radius gauge approached the desired radius. I was careful to avoid entering filings into the bearings. The saddles came pre-grooved, so the two middle ones could remain virgin. Consequently, the outer two strings are down lowest, and although being very close to the bridge´s front rim, they don´t touch it. String excursion is minute at this point. However, they will inevitably contact the rear rim if no material is cut away due to the steep break angle.
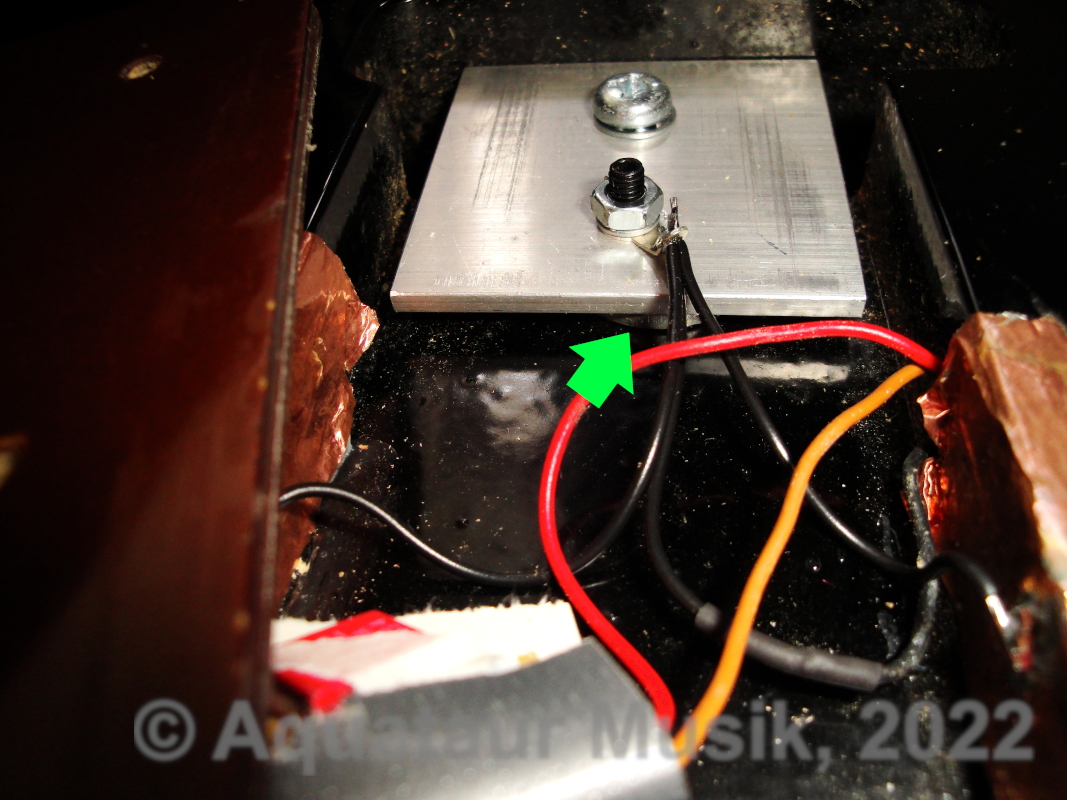
So yes, you do have to slot them (and by the way, the slots may need rework if you change string gauges...), but they will fit for a Les Paul... and not for a Stratocaster in most instances. For cutting the grooves commonly known precautions apply to prevent sitar-ing. Again, avoid filings entering the mechanism. Is this a no-brainer action? Hmmm. You decide. Manufacturer's claim: string does not move over the saddles due to the linear movement of the arrangement To my understanding, the string expands over the whole length between its mounting points. Its not that that it were locked at the saddle groove. However I agree that the movement may be much smaller as in the conventional case, plus there is no bending action over the saddles involved due to the contraption's movement in one plane only. All in all the TOM bridge appears not the best choice for a Fender type guitar, although I concede that mounting Fender saddles onto this arrangement would be a challenge, requiring considerable changes to the design. June update: Due to some new findings concerning neck mounting and sustain, I had to touch the neck again and consequently had to re-visit intonation. The first action helped trendously, the second one conjured up a problem. Since the neck indeed made a small movement towards the body with a creaking noise, this displacement had to be compensated by the intonation screws. Needless to say, I ran out of range on one string. I found a piece of aluminium sheet 1mm thick which I stuck between the stetsbar's underside flange (that oval piece of solid metal that protrudes into the cavity) and the guitar body where it rests against. This gives just enough additional adjustment range. So much for the touted easy installation. This once again proves that the TOM is not a good choice for a Stratocaster. LP's are short scale guitars, need fatter strings but less adjustment range. The Other Half Of The Equation It needs to be mentioned, that the whammy bar bridge itself is only half of the equation of a well working vibrato system. Any part the strings are contacting between the mounting points may introduce friction, first and foremost the nut and the string retainers. Tuners with tons of excess string winding or sloppy string mounting may introduce slippage. I recommend you inspect the nut grooves (particularly if varying string gauges or if this was never attended to at all). You may find you need to bring the nut grooves in shape to allow for lowest possible friction. There are many articles on the web that show you how to go about and why[2]. Again, this all may not be everybody's bag o´beans. Since I needed better tuners for a Telecaster equipped with mediocre tuners anyways, I moved the original Strat tuners onto this guitar and installed brand top lock tuners on the Strat. With these there is no need to have excess string wound around the post, so there will be no slippage to be expected upon stretching and releasing. In retrospect, they were quite reasonably priced for the quality and I needed them anyways, but quality standard tuners will work well too if you wind your strings properly. There is plenty of information on the web.My Strat has roller string retainers, which should not be problematic (as compared to the disgraceful piece of bent metal on the Tele that even prevents a humble string bend from returning to pitch). You see, those things should be taken care of in any instance. Other Observations
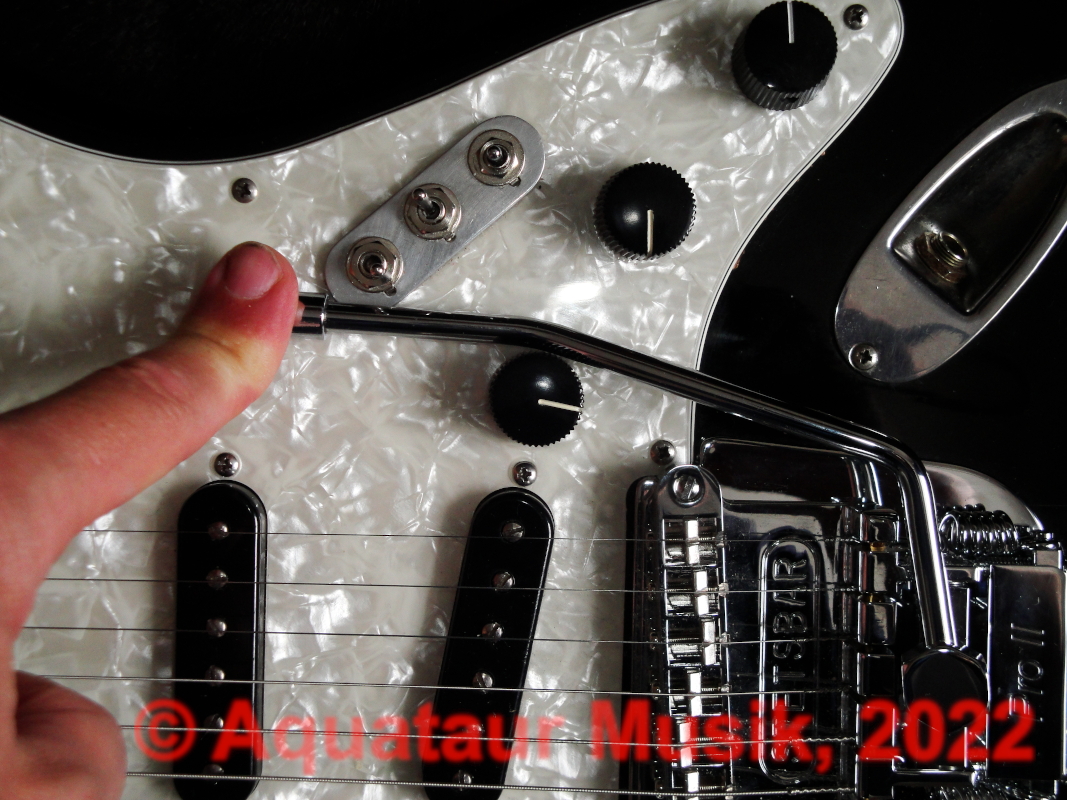
I have seen some people turn the arm 180° around (so that it sticks out of the guitar's butt end) and lift it up for maximum slack. In fact you can slacken the strings this way even more than in the usual position, since the arm does not obstruct its own motion by hitting the pick guard, unless one of the corners of the hexagonal "screw" shape arm mounting gets in the way. Try it. I have also seen a video with Jan Akkerman using the Stetsbar and he obviously has a custom arm on it. They say the arm stays put in any position you move it, and this is true - more than you would probably expect. There is a rubber o-ring between the screw and the arm which gets compressed. The rubber ring adds some friction and the arm tends to kick back, so it may take several attempts to have the arm where you want it. But a small dab of vaseline (which is explicitly neutral against synthetic rubbers...) on both sides makes this work smoothly. The taming of the screw so to speak. I always thought it cannot be in the spirit of the inventor to have the whammy bar dangling off the guitar and have guitarists continuously fetching it. Floating vs blocked: The way it is presented suggests that the system is non vulnerable against broken strings or dropped tunings - this is true only if you block the upwards bending action by means of their floating lock screws. Big deal, you can do that with any conventional floating tremolo. Even this system uses springs to counterbalance the string torque and there is no center detent of sorts that would warrant immunity against variations in pulling force. Verdict The secondary adjustment actions mentioned above are always needed get a floating-bridge tremolo working better, in which case you may find you are perfectly happy with what you have. That said, there is at least two major sources of friction less on the Stetsbar compared on a conventional (vintage) tremolo. Everything on this device is heavy quality and ultra-low friction. Indeed you can do an (almost) dive-bomb without gross de-tuning. The problem is not eliminated entirely (it possibly cannot be with the other imponderabilia) but harnessed. Although it is just another iteration of a floating tremolo system where string-pull is counteracted by a set of adjustable springs, the Stetsbar´s adjustment per se is a very precise and straightforward procedure, unlike fumbling around the back compartment with some dubious springs. The set-up of the floating bridge is an iterative process like on any other similar system. Note that re-stringing thus equally can grow into a nightmare until all strings are on pitch, unless you lock the bridge before with the stop screws. It is thus equally subject to de-tuning issues in case of a string break, different gauges and drop tunings like all others of their kind, unless one direction is blocked. Again, although a being quick and straightforward action, it is not an on-the-fly "performance" action. The tremolo-bar is comfortable and remains put where you leave it, but gets obstructed by controls on a Stratocaster at least if you are striving for dive-bombs. The "vintage" arm they offer might be different. String change is much faster than compared to through hole fiddling, and there is no noticeable tone change. In contrary, I feel the sound is beefier, but this may have been caused by an inferior neck shim that was previously used. Not all Fender guitars are made equal, so installation may not go as smooth and non-invasive as expected. String gauges are differing, the TOM bridge is not well suited for Fenders, so problems may arise concerning the intonation. The bridge lives in an awkward, somewhat "non-species-appropriate" condition, there is no adjustable stop tail piece, which puts extra force on the bridge and the strings, which might invite problems on the long run. The Stetsbar (with all the amendments and workarounds above) works well and looks good in my guitar. However, its installation is not as straightforward as they promise due to "overly simplistic assumptions" that go without mention. It is also not free of pitfalls. The Tune-O-Matic bridge demands a certain amount of modification (according to common sense and experience at least) for proper usage and may thus not be the final answer to all prayers. The finicky problems invited by using such a bridge on a Fender are not remotely addressed in the videos. It appears that the solution for Fender type guitars is half-baked. Not surprising to me, the official setup video is performed on a Gibson type guitar, that doesn't require any of this rigmarole...
... And those possible problems are not described. I found I allowed myself to get lured you into false assumptions, since I was not familiar with the problems of tremolos in general. Would I buy it again? Maybe for a Tele (which mounts directly onto the base plate; note you need a certain base plate mounting style, and their base plate may not be made out of the material you favor), but for a Strat I may certainly look closer into competitor´s designs, which are less expensive too. The advantages are not as clear-cut as the impression I had initially. All above observations and hands-on experience refer to a unit obtained at the time of writing (2020). Details may have changed meanwhile. Indeed, this is to be hoped... May this help you to make a confident decision, and may the company feel inspired to eliminate the flaws. Maybe never anybody told them? Reference [1] Haze Guitars (Gerry Hayes): Neck Shimming Made Easy, https://hazeguitars.com/blog/neck-shimming-made-easy [2] Paul Hostetter: Nut slots...with principles that apply, as appropriate, to bridge slots as well, http://www.lutherie.net/nuts.html Back To Index Update History
MAIN PAGE>MUSIC STUFF>STETSBAR |
|||||||||||||||||||||||||||||||||||
| MAIN PAGE | MUSIC STUFF | IMPRESSUM (c) 2020-25 AQUATAUR Musik & Elektronik |